Practice makes cinema
Simple skills, creativity elevate your video
You don’t need to spend thousands of dollars on a drone to have a very capable camera these days. What you get out of any camera you may fly depends a lot on the planning, practice, and creativity that you put in.
You also don’t need to go to film school (not to say it would not help) to learn a few techniques that turn a simple project into something special, visuals that really “pop.”
Watch and learn
You can learn a lot by watching your favorite shows and movies very closely, perhaps with a pause-rewind here and there. Re-watch your favorite features with an eye on the camera moves, and you will probably notice techniques that you did not see before.
Keep an eye out for crane, dolly, or tracking shots that might seem impossible to capture with ground-based camera systems. There is a good chance that a drone was involved.
The big three

Professional filmmakers use dozens of different kinds of shots, camera moves, and angles, but drones are particularly adept at three in particular: the nadir (sometimes called a “top down” or “birds’ eye”), the dolly zoom (aka “Hitchcock shot,” “Vertigo shot,” “Jaws effect,” or “Zolly”), and the crane.
Let’s break each of these down a bit. It will be very revealing.
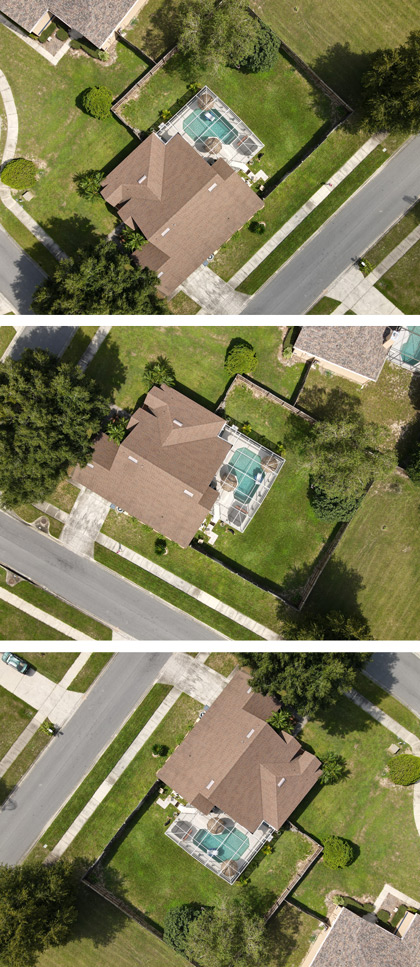
The nadir (I usually call it the “top down”) is simplicity itself: Point the camera straight down. This simple roll of thumb on wheel sets up a dizzying array of possibilities.
For example, you can begin the shot with the subject relatively close, perhaps a whole frame full of roof, then fly straight up as the video rolls, revealing the rest of the house (or other subject) in its entirety, then the surroundings. Drone lenses tend to have short focal lengths, which means they capture wide views, and there’s a lot of room between the extremes (don’t crash into the roof, or fly above 400 feet, please) to get creative.
Add some rotation (yaw) as you climb or descend, and you get a dizzying spiral effect that can be quite dramatic. Be careful, because spinning perspective like this might induce a little vertigo in the viewer (as in actual vertigo, not Vertigo the 1958 Alfred Hitchcock film that gave us the dolly zoom—we’re getting there).
Pro tip: Starting high and descending from a wide view to a tight view can be very tricky. Think obstacles, judging distance, and other complications that are easily avoided, because you can achieve that effect in post-production. Just reverse the timeline, and presto! You have a zoom-in. Flying forward, ever upward, is almost always safer, and this technique has been known to win awards.
Hello, dolly
Paramount second-unit cameraman Irmin Roberts is credited with being the first to come up with the dolly zoom for Vertigo, and it has been copied many, many times since, showing up in scores of films you may have seen. Steven Spielberg’s 1975 shark-in-the-water thriller Jaws builds the tension with a dolly-zoom-in on the police chief’s face as he witnesses a shark attack from the beach. Martin Scorsese used it to draw moviegoers into an intimate lunch with the mob in Goodfellas (1990). Unlike Henry Hill, however, this shot is legit. (These and other examples can be seen in this informative video.)
The dolly zoom creates an optical illusion, pulling the viewer into the shot and creating the sense they are falling into the frame, or being dragged. Some drones even have a built-in preset to make it easy. The DJI Mavic 2 Zoom is one such system, but you don’t need the fancy preset to achieve the effect.
You do not even need zoom capability, though it sure helps, because a dolly zoom is created by zooming in as you fly the camera away, or zooming out as you fly the camera closer to the subject. Zoom and movement in the opposite direction? That’s crazy, you say? It creates a very interesting visual. The subject (Roy Scheider’s horrified face in Jaws, or the stone floor at the bottom of the tower in Vertigo) maintains the same relative size in the frame while the background expands or recedes.
It takes some practice to get this right. You’re doing two moves at once, and they need to be timed well or the shot falls apart.
Don’t have a drone with a zoom-capable camera? YouTube to the rescue: This tutorial from Drone Film Guide walks you through how to achieve the affect in post with your video editing software.
The big reveal
A crane, in a Hollywood movie context, is a very expensive piece of equipment that small-budget films certainly can’t afford. A drone is very nicely suited to stand in. If you watch Netflix long enough, as so many of us have these days, you are going to see many crane shots that came from a drone.
A reveal is pretty much a variation of the crane shot, specifically, a crane-up. We have all seen countless crane shots where the camera ascends or descends to change the perspective from wide to narrow, or vice versa.
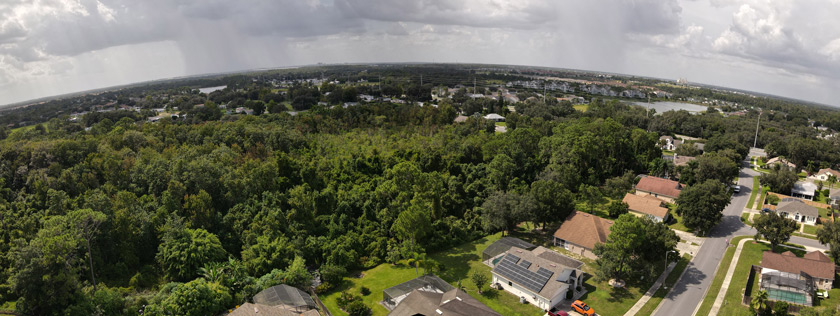
Crane shots are often set up to focus the viewer on a house, or a highway, or something specific, slowly revealing a wider perspective that brings the surroundings into the picture as the camera climbs.
Most of the time, the crane/drone stays on a single vertical axis, climbing straight up, though there is no rule that says it has to, particularly with a drone involved. You can crane on an angle. Just be careful about mixing more than one movement in the same shot—you can create distraction when what you are really trying to do is control what the viewer is focusing on.
A crane shot can tell a story.
Imagine starting your shot at ground level, in the driveway of a house in a typical neighborhood. At first, you can only see a garage door, maybe the front of a house. As you gently lift the camera skyward, the roof comes into frame, and some of the surrounding grounds. As the camera climbs even higher, the neighborhood is revealed. At the top of your shot, the distant twinkle of a city appears in the background. See how we used perspective to reveal one element after another, giving each a turn in the viewer’s focus? We told a story: Here is a house. It is a pretty nice house with a garage. It has a nice lawn. It’s in a nice neighborhood. And it’s not too far away from (or close to) this city.
Let your creativity kick in. Simple, consistent camera movements are key, but many approaches and directions will work.
Keep the camera angle constant as you climb, and the house slips out of the frame entirely and shifts the focus to the distant city skyline.
Or, you can lock the camera on the house, tilting as you climb to keep the subject in the frame while revealing the surroundings.
A third variation would be to lock the camera onto a detail on the house, such as the garage door, and allow the camera focus to remain on that spot as the change in altitude reveals the house and its surroundings.

Steady, Eddie
Engineers worked hard to design and build the gimbals that steady the cameras on our drones. Don’t waste all that hard work with herky-jerky flying. Some other useful tips for cinematic shooting will make a huge difference as well.
First, think subtle. Drone cinematography is usually not fast or furious. While you can certainly have some fun flying at high speeds, it is usually not very cinematic. You want to tell a story with your shots, and each should have a beginning and an end.
Think it through before you even leave the house—plan your shots! Almost nothing good in any good movie got there by accident.
Second, get very comfortable with your controls. Practice, practice, and then practice some more. Fly until your thumbs are sore. Look in your drone’s settings to see what adjustments you have available, particularly for the flight controls and gimbal. For example, DJI recently released a fantastic firmware update for the Mavic Air 2 that allows you to fine-tune stick response in each flight mode (Tripod, Normal, and Sport) for gimbal pitch and yaw sensitivity. You can dial in exactly how much input (acceleration and braking) you want. Slowing down the response of aircraft or gimbal can be a gold mine to a filmmaker seeking nice, smooth shots.
Lastly, think creatively, and don’t overlook the seemingly mundane. Not every subject has to be some epic wonder-of-the-world icon to make a beautiful film. Simple, relatable objects such as an interesting tree, or a winding road—even a perfectly straight road that stretches to the horizon—can offer intriguing views that pull viewers into your project.
Whether you are shooting for fun or more structured projects for profit, the principles stay basically the same. By observing what others have done in film and television, polishing your flying skills, and planning your approach, you can channel your creativity to make a lasting impression.


