Time for a change: DIY oil changes
Aircraft maintenance tips from 'The Educated Owner'
Before you start your aircraft’s oil change, it’s best to fly the airplane first to warm up the oil and help get the solid contaminants suspended in the oil, rather than collecting on the bottom of the oil pan. (Plus it’s a good excuse to go flying.)
 A half-gallon juice bottle works great for catching oil.
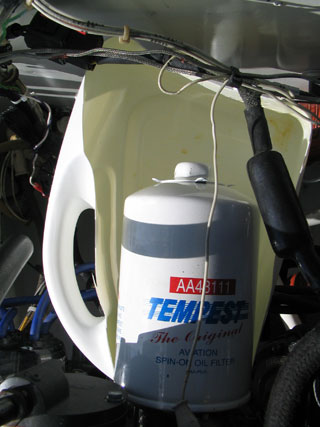
Changing the oil can be a dirty job, but to help make the process as clean as possible, I recommend an empty half-gallon juice bottle that you can cut to fit underneath your oil filter to catch the inevitable overflow of old oil as you make the switch to a new filter. If your aircraft is equipped with a quick-drain valve on the oil sump, you’ll need a hose to connect to the drain to route the old oil directly into the waste bucket. Quick-drain valves make the process much cleaner and faster. Adding one is always a good idea; just make sure that the valve is approved for use on your aircraft and that there are no interference issues on aircraft with retractable nose gear.
The process of changing the oil is very straightforward. Begin by removing the oil filler cap to increase air flow, hook up the drain hose, and open the quick-drain valve to start the flow of oil into the drain bucket. If you are doing regular oil analysis on your engine, let the oil flow for a minute or two before taking the sample to ensure that you get a clean, uniform sample.
I am a strong believer in performing regular oil analysis because it is a great way to monitor trends in the health of your engine. That said, any single oil analysis report is of limited value. The trends matter most. For that reason, I recommend either doing oil analysis at every oil change, or not at all. After a few analysis reports, you will begin to see what is normal for your engine and what trends may be beginning to develop. For example, if you see dramatically rising levels of aluminum over several reports, you may have a problem with the engine’s piston pin plugs. Another great benefit of oil analysis is that the analysis companies can be a wealth of information about the trends that you see. The reports will include notes from the technician, and you can always call to ask questions or discuss it in more detail.
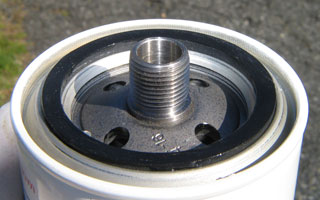 Prepare the new oil filter by applying a thin coat of Dow DC-4 to the rubber gasket.
Moving on to the oil filter, cut one side of the plastic container so that you can place it on its side, under the oil filter to catch any oil that drips out when pulling off the filter. Before you remove the old filter, prepare the new one by applying a thin coat of Dow DC-4 to the rubber gasket and filling the filter with some new oil. It’s also a good idea to write the date and engine time on the new filter so you’ll know at a glance when it’s time for the next change.
With the new filter within easy reach and your catch basin in place, cut off the safety wire and loosen the filter with the ratchet until it can be easily turned with your hands. Then spin it off, catch it in the plastic, and quickly replace it with the new one. The new filter doesn’t need to be fully tight to keep the oil from dripping out of the engine. Use this time to remove the catch basin and old oil filter from the engine compartment.
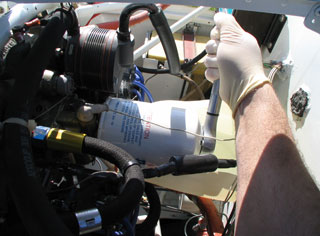 Tighten the new oil filter to the proper specification.
With the oil filter out of the way you can use the torque wrench to tighten the new filter to the specification listed on the outside of the filter (typically around 17 foot-pounds). Replace the safety wire, and the filter will be ready for the next 50 hours.
Before refilling the oil, it’s also important to remove and check the finger screen on the oil sump (if your engine is equipped). On most Lycoming engines, there is a large bolt on the bottom of the sump that holds this screen. It’s a coarse filter that’s meant to keep large chunks of metal from being sucked up by the oil pump. If you find something in this filter, chances are you have a real problem to deal with.
Once the filter and screen are replaced, you can finish the job by refilling the crankcase with oil. Be sure to count the number of quarts of oil as you fill the engine and be especially careful to remove the plastic cap lock rings from the quarts before turning them upside down into the filler neck. You don’t want to take the chance of plastic pieces getting into your crankcase.
The last step is entering the oil change into your aircraft’s engine logbook. You can include the date and engine hours, oil and filter type, number of quarts of oil, and your signature with the words “Aircraft Owner” at the bottom of the entry.
DIY oil changes are a great way to learn about the health of your engine, while saving some money in the process. Think of it as a free hour of flying every 50 hours, courtesy of your own sweat equity. And who knows, that first DIY oil change may eventually lead to more owner maintenance and, before you know it, you're on your way to becoming an A&P mechanic!
Gathering supplies for the oil change
Before you set out for the airport to change your aircraft’s oil, begin by gathering the tools and supplies that you’ll need for the job.
- Torque wrench
- 1-inch socket for the oil filter
- 1.5-inch socket for the oil finger strainer plug (for typical Lycomings)
- Ratchet driver
- Safety wire
- Safety wire pliers
- Needle nose pliers
- Wire cutters
- DOW DC-4
- Replacement oil filter
- Gasket for the finger screen
- Bucket to catch dirty oil
If you plan to do oil analysis, be sure to bring the sample container along as well.
Jeff Simon is an A&P mechanic, pilot, and aircraft owner. He has spent the last 14 years promoting owner-assisted aircraft maintenance as a columnist for several major aviation publications and through his how-to DVD series: The Educated Owner. Jeff is also the creator of SocialFlight, the free mobile app and website that maps over 5,000 aviation events happening throughout North America. Free apps available for iPhone, iPad and Android, and on the Web at www.SocialFlight.com.
RELATED LINKS:

Related Articles


