Scan school
Instrument flying’s most important skill
Fly the airplane. You’ve heard the mantra as it relates to emergencies, but its usefulness goes beyond bad situations.

Instrument flying is the culmination of three skills: flying by reference to instruments, routes and approaches, as well as working within the air traffic control system. Of the three, flying by reference to instruments is the most important. Regardless of what’s happening with ATC, your routing, clearances, and so on, you must always be comfortable and confident flying the airplane.
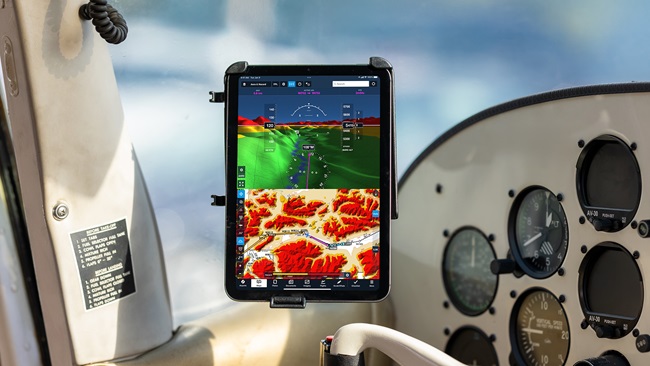
Instrument scans have changed dramatically in recent years, thanks to the advent of reliable glass cockpit displays. AOPA Editor at Large Dave Hirschman recently made the argument that flying instruments with a glass cockpit has virtually eliminated the need to scan (aopa.org/news-and-media/all-news/2021/october/pilot/ifr-technique-glass-panel-precision). When there’s a giant attitude indicator in the center of your vision and trend tapes for speed and altitude immediately adjacent, gathering information from a glass panel is more looking than scanning.
For many pilots who continue to fly with conventional instruments, the scan forms the foundation upon which all instrument flying is based. Everyone has a different technique, and your instructor will either expose you to a few or teach you one and expect you to use it. Regardless of which technique is used, there are a few dos and don’ts for making an instrument scan successful.
Do: Know what the instrument is telling you.
The airspeed indicator, altimeter, attitude indicator, turn coordinator, heading indicator, and vertical speed indicator each present distinct information. Sure, they sometimes overlap, such as in the case of an altimeter and vertical speed indicator. But there are subtle and important differences to what each instrument shows. The altimeter shows your current altitude and whether you are climbing or descending. The VSI shows whether you are climbing or descending (with certain limitations), and at what rate. To manage the information effectively you need to first understand the distinctions and limitations of each instrument.
Do: Use the correct instrument for each phase of flight.
Knowing what each instrument shows is only the first step. You must then take that knowledge and apply it to the airplane’s condition. For example, if you know an attitude indicator shows the nose in relation to the horizon, you wouldn’t want to use it to verify you are level in a situation such as slowing down the airplane prior to the initial approach fix. Instead, you must rely on the altimeter as the primary source of information on whether you are climbing or descending.
Do: Cross-check with a backup instrument.
Because some of the information the instruments present overlap each other, most aircraft conditions have a primary and a secondary indication. In the previous example, the altimeter is a primary indication of how well you’re holding altitude as you slow for the initial approach fix, but the vertical speed indicator is a useful cross-check. If the two agree, you can be assured you are level.
Do: Be deliberate.
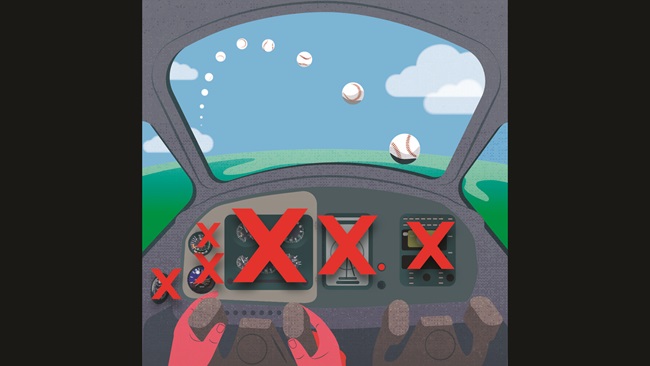
Many textbooks portray the instrument scan as a game of Pong where the eyes dart back and forth in a predictable pattern across all six primary instruments. That may be a good place to start your training, but it’s not how most seasoned pilots fly. Know what you’re looking for on each instrument, and take the time to process the information. Just like you wouldn’t want to constantly pump the throttle in and out on final approach, or constantly push and pull on the yoke, your eye movements shouldn’t necessarily be quick, and definitely not random. Be deliberate. Continuing the above example, a good technique would be to slowly reduce power while raising the nose. Look to the altimeter to verify you aren’t climbing or descending, then quickly down to the VSI to verify, then over to the heading indicator to verify you aren’t turning, up to the airspeed indicator to verify you’re on speed, and back to the altimeter. There are many other ways to do it, but the goal is always to deliberately gather information and ensure that you’re internalizing what you see and not just looking at it without thinking or reacting.
Do: Trust your scan.
There will come a time when your body feels one thing and your eyes see another. This can be a powerful sensation where your instinct is to immediately follow what you feel. We tend to trust our body’s internal motion sensors as a primary indication of where we are in space. When you’re in the clouds and on instruments, don’t do it. Trust your scan, trust your instruments, and fight the urge. This feeling of vertigo can happen to seasoned pilots just as easily as it can to new pilots, so don’t feel bad if it happens early in your training. Just remember that so long as your technique is strong, you should trust your eyes more than your body when you’re in the clouds.
Don’t: Rely on the attitude and heading indicators.
Maybe it seems contradictory to now say not to trust your attitude and heading indicators, but just believe us when we say you’ll be a much better instrument pilot if you don’t rely on these failure-prone instruments. Airplane vacuum systems are notoriously unreliable, and worse, they fail in the most dangerous way. The tendency for all instrument pilots is to stare at the attitude indicator and use it for nearly every flight condition. It makes sense given that it provides the most direct visual representation of the aircraft’s condition. However, when it fails, the instrument will slowly, over a period of minutes, go from reliably showing your attitude to showing a bank. Gyros take a long time to spool down after the vacuum system fails, and it can be difficult to know when that’s happening. If you don’t rely on these instruments for all phases of flight it won’t be a problem.
Don’t: Fixate on any one instrument.
Ask any instrument instructor the most common error new students make, and nearly all will say fixating. Watching someone fixate on an instrument is an interesting experience because it’s immediately apparent to the observer what’s happening, while the pilot flying is completely unaware. Let’s say ATC has given you an altitude assignment. The tendency is to focus on the altimeter in order to nail that assignment. No one wants to get busted, after all. But as soon as you focus solely on your altimeter your ability to maintain a heading will suffer. It’s not uncommon to see people get 20, 30, or 40 degrees off their heading before they realize they’ve been staring at the altimeter the entire time. Earlier we said not to Pong around the panel, and that’s true. But it’s also important not to stare at any one instrument. Keep it to no more than a few seconds and you’ll be fine.
The beginning stages of instrument training can sometimes seem tedious as you drone around squarely in the middle of the envelope doing 20-degree-banked turns or 500-foot-per-minute climbs, but developing a good scan and basic instrument flying skills will translate to any airplane or type of flying you may do later. [email protected]

Ian J. Twombly
Related Articles