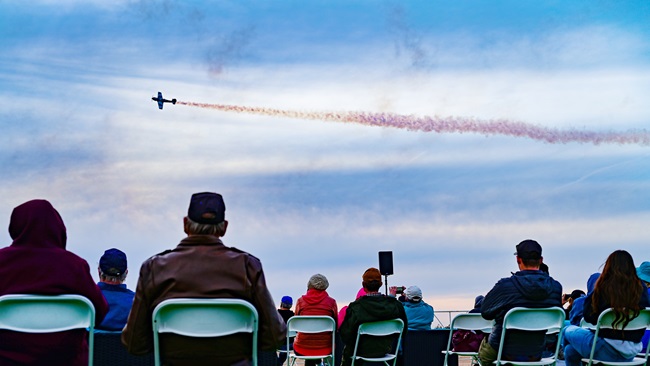
Give your drone videos a cinematic touch
Flying smoothly and planning your shots in advance make for better drone videos. Understanding your equipment and settings, and knowing a bit about editing, will also help.

Take 1: Proper preparation improves performance
In a previous story about taking better still photos, we talked about how important it is to plan and prepare. This goes for flying in general, but we are focusing on shooting great aerial video here rather than the mechanics of flying. However, always remember that flight safety is your No. 1 priority, and letting yourself get too consumed in the photography side of things can be a distraction. Practice, practice, and more practice on the ground will serve you well in getting comfortable with the photo and video settings and controls.
As tricky as shooting stills can be, getting good video adds a whole new layer of complexity. In addition to the usual elements like good composition, angles, and settings, you now have to consider motion. Motion comes in two basic forms: Either you are moving the drone along a scene or your drone sits stationary while objects move by below.
Before you fly, take a walk around the area to scout out the scene. Take note of special features or objects you plan to shoot and and potential obstacles to avoid.
Take 2: Ready, set…
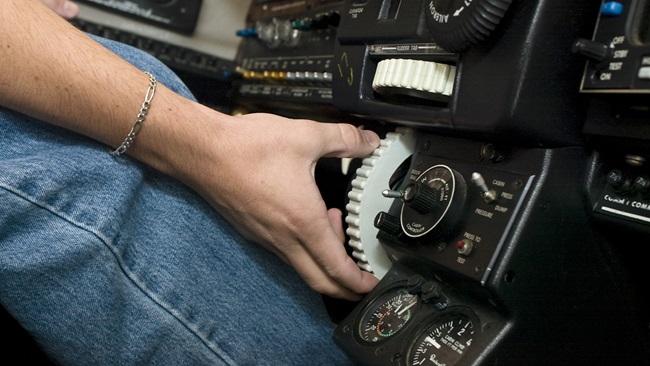
Getting your camera settings right will make a huge difference in the final product. Many drone apps such as DJI Go have a range of options built in. Automatic settings can be fine for those new to shooting video, but as you advance, don’t be afraid to explore the manual side of things. You will see a tremendous difference the more you learn to refine your settings manually.
The question of shooting in 4K is common. As more and more drone cameras offer this very high-resolution format, you should keep in mind this also creates a huge file size. Do you really need to be shooting in 4K? Maybe, maybe not. If you plan on further editing your footage to be enjoyed on a large screen, then 4K might be the right choice. If your goal is to produce short videos to upload to social media or watch on smaller screens such as mobile devices and tablets, then 1080 (HD) should be perfectly fine.
Another thing to remember is that editing 4K video in post production is heavily demanding on your computer. Unless you are using a very recent, powerful computer with loads of memory, you are likely to encounter frustrating stuttering and hiccups as you try to watch and edit the footage. Again, this is due to the very large file sizes that the machine is trying to handle. (An interesting side note: I have found that my iPad Pro running Lumafusion can manage, play, and edit 4K footage beautifully.)
Frame rate and shutter speed are other important considerations. It is common to shoot at 24 frames per second or 30fps, and a good rule of thumb is to keep your shutter speed at least double your frame rate. This ratio helps preserve the natural look and motion blur of your shot. The wrong shutter speed will create a too-dark/too-light or choppy, unnatural look. A good practice exercise is to try out different settings in different lighting and environments until you get the feel for how they work.
Don’t forget about filters. Neutral density (ND) filters are like sunglasses for your camera to help balance the amount of bright light entering the sensor, and prevent the bright parts of the frame from being "blown out." ND filters usually range from ND4 up through ND8, ND16, and so on, progressively getting darker. Keep in mind that ND filters will keep the shutter open longer, so keep an eye on your shutter speed when using an ND filter.
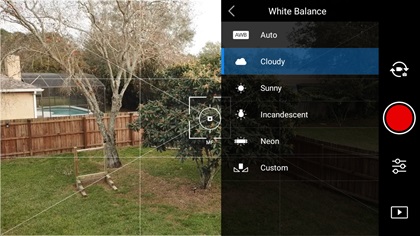
White balance can also be easily overlooked. Get familiar with manually setting the white balance. Auto white balance may sound like the easy way, but you will find your video quality suffering as the camera struggles to adjust when you pan from light to dark areas of your shot. It will be uneven with sudden jarring exposure transitions, to say the least. You can choose presets made for sunny, cloudy, or indoor lighting conditions, or even use your own custom settings. The idea here is to avoid relying on auto for white balance.
Take 3: Action!
Now that we have a handle on some settings and you’ve planned what to shoot, how do you fly and handle your camera and gimbal to make it look professional? A quick look at videos on YouTube or social media can leave you dizzy. The quick, sharp pans left and right; tilting horizon; sudden jolts; and any unexpected movement just scream "amateur!" The idea is to take the viewer on a journey rather than put the spotlight on just how acrobatic your flying is. Smooth video almost always looks better.
Compound movements can sometimes (and I mean rarely) be a good thing, but more often they are simply jarring. To avoid this, try only moving the camera gimbal in one direction per shot. Pan or tilt, but not both. A smooth, slow tilt up or down or gliding forward over a field or toward a structure presents much better than a bunch of jerky twists. Pans left and right can be tricky as they will sometimes show some stutter, particularly if they move too quickly.
Keep in mind there are always exceptions in cases of shooting for special effects or dramatic angles, but for the most part smooth, steady, and clean flying and camera work will make your videos stand out beautifully. Keep it simple.
Short shots are great too! Try not to concentrate on taking long one- or two-minute clips. Rather, break up your clips into shorter 10- to 30-second lengths. These smaller runs give you more control and allow you to take multiple angles or views for editing later. Try shooting the same scene from several altitudes or angles and once again, keep altitude in perspective with your subject. We are not out to impress anyone with how high your drone can fly.
Speaking of altitudes…sometimes you want to get a little lower and closer to your subject but your inner voice is telling you to stop. It’s usually a good idea to listen to that pesky gremlin because it could be telling you that it is unsafe to fly in such tight quarters or your skill level might not be up to that point yet. But how do you get that steady, stable video footage you so desperately need from your drone’s gimbal without flying it? Well, do it without flying your drone!
Most drone cameras will work even if you are not flying, and in a pinch, you can literally pick up your drone and carry it around while filming. There are also accessory attachments for models such as DJI Mavic Pro/2 like the Katana from Polar Pro. The Katana is basically a set of handles that fasten to your drone so you can carry it better for smooth and easy filming.
If you really want to take it up a notch, you can spring for the new DJI Osmo Pocket. This incredible little device uses the same camera found on the DJI Mavic Air, but mounted on a tiny, pocket-sized handle complete with a built-in screen to view and control.
Having an option to shoot supplemental video where it might be impractical to actually fly will allow you to expand the scope of your video presentation by getting those shots you would otherwise have to forfeit.
That’s a wrap!
While you are out shooting, don’t forget about editing. Editing can be as simple or as complex as you care to make it. For something quickly posted to social media, your flight app may have built-in editing and upload tools already. To get a bit fancier, you may have something like iMovie on your Mac or iPad or Movie Maker for Windows. These apps offer some great essential tools to add titles and transitions, voice overlay, and other effects.
Graduating up a notch to professional software, you will find Final Cut Pro X and Adobe Premiere will offer you the tools, and complexity, to create commercial-grade videos.
iPad users also have iMovie but Lumafusion has become extremely popular due to its pro-level editing features and power to handle larger files easily. Combined with Apple Pencil, it is a fantastic option for editing on the go.
While these pointers will get you started on the road to creating your own cinematic masterpieces, never forget that photography, whether stills or video, is art. There are endless combinations of settings, angles, lighting, and other elements that make your work unique, so don’t be afraid to get creative and experiment. So much of this you can practice in your own backyard or any place convenient and safe to fly. So, get out there and have fun creating your next masterpiece!