Pattern Primer
Essential tools to flying in the traffic pattern
By Carlos Bousono
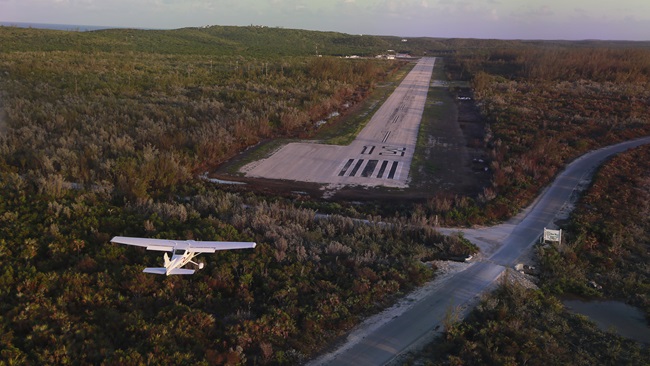
Traffic patterns are an essential part of every flight, and exercising good aeronautical judgment is necessary when flying them. If there is a place to be overly cautious, it is in the pattern at a nontowered airport—where arriving and departing traffic mix with students making circuits for takeoff and landing practice. Patterns exist to provide an orderly flow and to make your actions predictable to other pilots.

Planning how to approach and land at a nontowered field starts long before the airport is in sight. No less than 20 nautical miles from your destination, get the automated weather in one radio, while monitoring the common traffic advisory frequency (CTAF) in the other one.
As you approach the destination airport, determine the number of nautical miles at which to start descending from your cruise to your target altitude. Approximate it by multiplying the number of feet in thousands you need to lose by three.
When getting close to the airport, turn on your landing lights, and no less than 10 nm from the runway, specify your type of aircraft and position on the common traffic advisory frequency. Let the traffic know you intend to overfly the airport at least 2,000 feet above the midfield (“Marco traffic, Skyhawk One-Two-Three, 10 miles northwest at 3,000 feet, will be overflying the field at 2,000, Marco”). Many pilots prefer to identify their aircraft by color and type (“green Skyhawk”) for easy identification by other traffic. Midfield is the safest point from which to determine the existing wind and traffic conditions. Also, it is best if you carry out your prelanding checks at a point where you feel you can safely divide your attention between performing the checklist and looking for traffic—never when you are maneuvering.
'Standard' deviation
The Airplane Flying Handbook specifies that at nontowered airports, “it is the pilot’s responsibility to determine the direction of the traffic pattern, to comply with the appropriate traffic rules, and to display common courtesy toward other pilots operating in the area.” So how does a pilot determine the flow of traffic? A standard traffic pattern is made with left turns, usually at 1,000 feet agl. The FAA notes “RP” for a runway on sectional charts and “Rgt tfc” in chart supplements to denote right traffic, and pilots overflying a field can see the direction of traffic from traffic pattern indicators in a segmented circle. Pattern altitudes are listed in the chart supplement. Note that faster twins and jets may have a higher pattern altitude and will fly wider patterns.
Helpful formulas
To calculate how far out to start your descent: Distance in nautical miles equals thousands of feet to descend multiplied by three.
To determine the rate required for a 3-degree glidepath: Required rate of descent (in feet per minute) equals groundspeed (in knots) multiplied by five.
To perform a rough crosswind calculation by determining the angle existing between the wind and the runway: Drop the last digit, divide the result by six, and apply this correction factor to the wind speed.
No other factor is going to affect your landings more than the wind. You may perform a rough crosswind calculation by determining the angle existing between the wind and the runway, dropping the last digit, dividing the result by six, and applying this correction factor to the wind speed.
For example, if the wind is 230 degrees at 10 knots and the available runways are 8/26, you will use Runway 26. The angle between wind and runway direction is 260 degrees - 230 degrees = 30 degrees; the correction factor is 3 ÷ 6 = 0.5, or 50 percent; and the crosswind component is 50 percent of 10 knots, or 5 knots. Crosswind correction requires smooth, deliberate input to maintain lateral stability and directional control by the pilot through approach, flare, and touchdown.
Once you are over the field at approach speed, relay your intentions (“Marco traffic, Skyhawk One-Two-Three overflying the field at 2,000 feet, will be joining 45 degrees to the left downwind of Runway 17, Marco”). To improve situational awareness in the pattern, set the heading bug to the landing runway.
There are different options to enter the circuit, but one of the safest is to overfly the airport perpendicular to the landing runway toward its downwind, and one to two nautical miles beyond the downwind leg perform a descending turn opposite the pattern direction. This will enable the aircraft to join the pattern from a 45-degree downwind intercept. Use this descending turn to pattern altitude as an opportunity to clear the area.
Instrument traffic may be landing straight in from a long final, so scan past the immediate surroundings of the airport (and you may want to monitor the IFR approach frequency simultaneously, especially if you are VFR below an overcast layer). Avoid bank angles greater than 30 degrees while in the pattern, as the additional load factor increases the stall speed.
As you join 45 degrees to the downwind, communicate again to the local traffic (“Marco traffic, Skyhawk One-Two-Three, joining 45 degrees to the left downwind of Runway 17 at midfield, Marco”). The correct distance between the downwind leg and the runway is that which will allow you to make a no-power landing should the need arise (usually, 0.5 to 1 nautical mile). In a low-wing aircraft, keep the runway near the wing tip. In a high-wing aircraft, you can keep it halfway up the lift strut as reference. Always crab into the wind so as to maintain a ground track parallel to the runway.
On the downwind leg (usually at 800 to 1,000 feet above ground level), maintain the appropriate speed. A good guide is above 1.4 VS0 (40 percent more than the stall speed in landing configuration), but less than VFE (top of the white arc or the speed for the first notch of flaps, whichever is higher).
Unless you are following traffic, reduce the power abeam the touchdown point, select the first notch of flaps, drop the landing gear if retractable, and adjust the speed to start a 500-foot-per-minute descent path. You should get used to the normal descent attitude (the picture) of the airplane in this phase and avoid chasing the needles.
On a no-power approach, immediately turn toward the runway with no flaps until landing is assured and, if you are too high, use a forward slip (ailerons into the wind and opposite rudder) or S-turns to lose altitude and properly position the aircraft for landing.
Planning how to approach and land at a nontowered field starts long before the airport is in sight. After clearing for traffic, you will start turning to the base leg 45 degrees beyond the touchdown point, at which you will have descended about 200 feet. You will add a second notch of flaps, if applicable; you will communicate (“Marco traffic, Skyhawk One-Two-Three, turning left base, Runway 17, touch and go, Marco”); and you will perform, once again, the prelanding checks, for which you can use the GUMPFSS mnemonic: Gas (fuel selector and electric fuel pump), Undercarriage, Mixture, Propeller, Flaps, Switches (landing lights, carb heat), and Seat belts. Make sure you clear the opposing base leg, as helicopters frequently fly opposite-hand patterns.
You will turn to the final leg at around 500 feet agl and intercept the extension of the runway centerline, configuring the airplane with full flaps, and communicate (“Marco traffic, Skyhawk one-two-three, turning final Runway 17, touch and go, Marco”). Once established, you should adjust your reference speed (published in the pilot’s operating handbook) to existing wind conditions by adding 50 percent of the wind gust.
Maintain a stabilized approach (aircraft properly configured, checklists completed, and performing only minor adjustments) while you aim at a spot about 100 feet short of the desired touchdown point, making sure that point remains constant in the windscreen during the approach.
When descending through 250 feet agl, correct for any crosswind that may exist by sideslipping with rudder and aileron. The rudder aligns the nose of the airplane with the runway, and the ailerons maintain lateral drift by lowering the upwind wing (if there is, say, a left crosswind, you will use left aileron to maintain centerline and right rudder to straighten the nose before touchdown). If at any point your final approach becomes unstabilized below 400 feet agl, consider going around (“Marco traffic, Skyhawk One-Two-Three, going around, Runway 17, Marco”).
Start your flare 10 or so feet above the runway by increasingly pitching up to reduce speed and decrease rate of descent. Focus at a point about 1,000 feet down the runway. The airplane should reach a near-zero rate of descent one to two feet above the ground and five to eight knots from stall speed. Increase back-pressure slightly to hold the airplane off the runway with the engine idling (or using a touch of power to achieve a gradual merging with the surface for soft fields) until it gently settles over it, touching down with the main gear first in a nose-high attitude. As the airplane decelerates, relax back-pressure.
If you are landing on a short field, as you roll out, select flaps Up and maximum braking (but don’t lock the brakes). If you are landing in a soft field, keep the nose high for as long as possible and don’t use any braking. If it’s a normal or soft-field landing, don’t perform the after-landing checks until you’ve cleared the runway. And if you are executing a touch and go, make sure flaps are up or configured for takeoff and there is enough remaining runway before adding takeoff power.
Rotate the airplane at VR, maintain runway heading, and don’t start cleaning up until you have achieved a positive climb, are clear of obstacles, and with an airspeed of at least best rate of climb (VY). Don’t make any turns until 500 feet agl and clear of traffic. Depart the pattern from the closest leg to your intended heading. Don’t forget to communicate your departure (“Marco traffic, Skyhawk One-Two-Three, departure Runway 17, will be flying to the south, Marco”).
Carlos Bousono, CFII MEI, is an entrepreneur and aviation writer. He instructs at RexAir Flight School in Naples, Florida.
Related Articles